
My Kitchen Reno Nightmare (And How You Can Avoid the Same Mistakes)
My Kitchen Reno Nightmare (And How You Can Avoid the Same Mistakes)
Let me start with the truth: our kitchen reno was supposed to take six weeks. It took four months. We were supposed to spend $25,000. We spent $38,000. And there was a two-week period where we had no running water in the kitchen and were living off takeout and microwave meals.
But here's the thing - despite all the chaos, stress, and budget overruns, I'd do it again in a heartbeat. Because now we have the kitchen we actually wanted instead of the dated nightmare we lived with for eight years.
If you're thinking about a renov kitchen project, this is the honest story you need to read. Not the glossy magazine version where everything goes perfectly, but the real deal with all the problems, surprises, and hard-won lessons.
Why We Finally Decided to Pull the Trigger
We'd been talking about redoing our kitchen for years. Every time we cooked dinner, we'd complain about the cramped layout. Every time friends came over, they'd end up crowded around our tiny island while we tried to prep food in what felt like a hallway.
Our kitchen was stuck in 1995. Oak cabinets that were starting to show their age. Laminate countertops with burn marks from where someone had set hot pans down. A backsplash made of basic white subway tiles that looked dirty no matter how much we scrubbed them.
But what finally pushed us over the edge was the dishwasher dying. When the repair guy told us it would cost $400 to fix a fifteen-year-old machine that might last another year, we realized it was time to stop putting band-aids on everything.
My wife Sarah found this photo online of a kitchen that looked exactly like what we wanted. White cabinets, quartz countertops, a big island where people could actually sit and hang out. "This is it," she said. "This is what I want our kitchen to look like."
So we started the process of turning that dream photo into reality. Which turned out to be way more complicated than either of us expected.
The Research Phase (AKA Going Down the Rabbit Hole)
Once we decided to move forward, I became obsessed with researching everything about kitchen renovations. I spent weeks reading blogs, watching YouTube videos, and scrolling through Pinterest boards.
The amount of information out there is overwhelming. Everyone has opinions about what kind of cabinets to buy, which contractors to hire, whether you should splurge on appliances or save money on less visible stuff.
I made spreadsheets comparing different cabinet manufacturers. I created a folder on my computer with hundreds of photos of kitchens I liked. I even started a notebook where I wrote down every tip and piece of advice I found online.
Looking back, some of that research was helpful. But a lot of it just made me more confused and anxious about making the wrong choices.
The most valuable thing I learned during the research phase wasn't about products or materials. It was about the importance of finding the right people to work with. Because your contractor and designer will have more impact on your experience than any cabinet or countertop you choose.
Finding Contractors (The Most Important Decision You'll Make)
This is where things got tricky. We live in a pretty competitive area for contractors, and everyone we wanted to work with was booked out for months.
I started by asking friends and neighbors for recommendations. The problem was that most people had either used someone years ago or had mixed experiences. "Oh, Mike did our bathroom and it turned out great, but he was three weeks late and went over budget."
We got quotes from six different contractors. The prices ranged from $22,000 to $45,000 for basically the same scope of work. Which immediately told me that either some people were way overcharging or others were cutting corners.
The lowest bidder seemed nice enough, but when I asked for references, he got defensive. "Look, I've been doing this for twenty years. You don't need to check up on me." That was a red flag.
The highest bidder had an amazing portfolio and great references, but wanted a 50% deposit upfront and couldn't start for four months. That felt risky.
We ended up going with someone in the middle. Tom had been doing kitchen renovations for twelve years, showed us three recent projects that looked great, and gave us contact info for past clients without us even asking.
His references all said the same things: he's honest, he shows up when he says he will, and he fixes problems instead of making excuses. That sounded perfect.
The Design Process (Where Dreams Meet Reality)
Working with a kitchen designer was something I'd never done before. I figured we'd show her the photo Sarah liked, she'd draw up some plans, and we'd be ready to go.
Turns out it's way more complicated than that.
Our designer, Lisa, started by asking us a million questions about how we actually use our kitchen. Do we cook every night? Do we entertain a lot? Do we need a lot of storage? Where do we like to prep food? Do we want the island to be for eating or just extra counter space?
Some of these questions seemed obvious, but others made us really think about our habits. Like, we always pile mail and keys on the counter by the door. So she suggested adding a small station there with hooks and a drawer specifically for that stuff.
The first design she showed us looked nothing like the photo Sarah had saved. It was actually better. She'd figured out how to give us way more storage and counter space while still keeping the general style we wanted.
But then came the budget reality check. Everything we wanted - the quartz countertops, soft-close drawers, under-cabinet lighting, the fancy range hood - added up to way more than we'd planned to spend.
Lisa walked us through what she called "the priority exercise." We made a list of everything we wanted and ranked it from "absolutely must-have" to "would be nice but we can live without it."
Must-haves included more storage, better lighting, and a bigger island. Nice-to-haves included the pot filler over the stove and the wine fridge. We ended up cutting about $8,000 worth of nice-to-haves to stay closer to our budget.
The Permit Process (Government Bureaucracy at Its Finest)
Nobody warns you about how much paperwork is involved in a kitchen reno. Because we were moving some walls and updating electrical, we needed permits from the city.
Tom handled most of this, but I still had to take time off work to meet with the inspector. Who showed up two hours late and then found three things that needed to be changed in our plans.
"This outlet needs to be six inches to the left," he said, pointing at our plans. "And you'll need a dedicated circuit for the microwave."
These seemed like tiny details, but they required updated drawings and another review process. What should have taken two weeks ended up taking almost a month.
The lesson here is to build extra time into your timeline for permit stuff. Government moves slowly, and there's nothing you can do to speed it up.
Demo Day (The Point of No Return)
The first day of actual construction was both exciting and terrifying. Watching someone take sledgehammers to your kitchen feels like a huge commitment.
Tom and his crew showed up at 7 AM sharp with tools and protective plastic. By lunchtime, our old kitchen was completely gone. Just bare walls and exposed electrical wires.
Sarah took one look at the destruction and started crying. "What have we done?" she said. "Our kitchen is gone."
I felt the same panic. For eight years, we'd complained about our kitchen. But at least it was functional. Now we had nothing.
Tom assured us this was normal. "Everyone freaks out on demo day," he said. "Trust the process."
The demo phase took three days instead of the planned one day because they found some plumbing issues behind the walls that needed to be fixed. This was our first taste of how renovation timelines are basically fictional.
The Hidden Problems (There Are Always Hidden Problems)
Here's something no one tells you about kitchen renovations: your walls are probably hiding problems that won't be discovered until you tear everything apart.
In our case, the previous owners had done some electrical work themselves that wasn't up to code. The inspector wouldn't let us proceed until it was fixed properly.
We also discovered that our subfloor had some water damage from a dishwasher leak that happened years before we bought the house. It wasn't dangerous, but it needed to be replaced.
And the worst surprise: our kitchen window was slightly smaller than standard size, which meant the new cabinets we'd ordered wouldn't fit properly. We had to either reorder custom cabinets (adding two weeks and $3,000) or have the window enlarged (adding one week and $1,200).
We chose the window option, which meant our schedule was already shot by week two.
Tom kept apologizing for all the delays, but I did some research and found out this is totally normal. Almost every renovation uncovers surprises that add time and money to the project.
Living Without a Kitchen (Harder Than You Think)
For six weeks, we had no functioning kitchen. The microwave and coffee maker were set up in our dining room. We washed dishes in the bathroom sink. Our refrigerator was plugged into the living room.
The first week was kind of fun. We ordered pizza, tried new restaurants, ate a lot of sandwiches. It felt like camping.
By week three, we were sick of takeout and desperately missing home-cooked meals. By week six, Sarah was researching extended-stay hotels just so we could have access to a real kitchen.
The hardest part wasn't the lack of cooking facilities. It was the noise, dust, and constant disruption. Construction starts early and goes all day. There's no escape from the chaos.
If I were doing this again, I'd budget for eating out way more than we did. And I'd definitely set up a better temporary kitchen situation in another part of the house.
The Ordering and Delivery Nightmare
Coordinating all the different components of a kitchen renovation is like managing a complicated puzzle where half the pieces are coming from different stores and manufacturers.
Our cabinets were ordered twelve weeks in advance and arrived exactly on time. Great! But the countertop company needed the cabinets installed before they could come measure for the quartz tops. And they needed two weeks from measurement to installation.
The appliances were supposed to arrive during week four. The refrigerator and dishwasher showed up on schedule. The range was backordered for three weeks. The hood was damaged during shipping and had to be reordered.
Meanwhile, Tom and his crew were trying to coordinate their work around these delivery schedules. They couldn't install the cabinets until the electrical and plumbing were completely finished. They couldn't do the backsplash until the countertops were in.
It was like a construction choreography where everyone had to hit their marks perfectly or the whole thing fell apart.
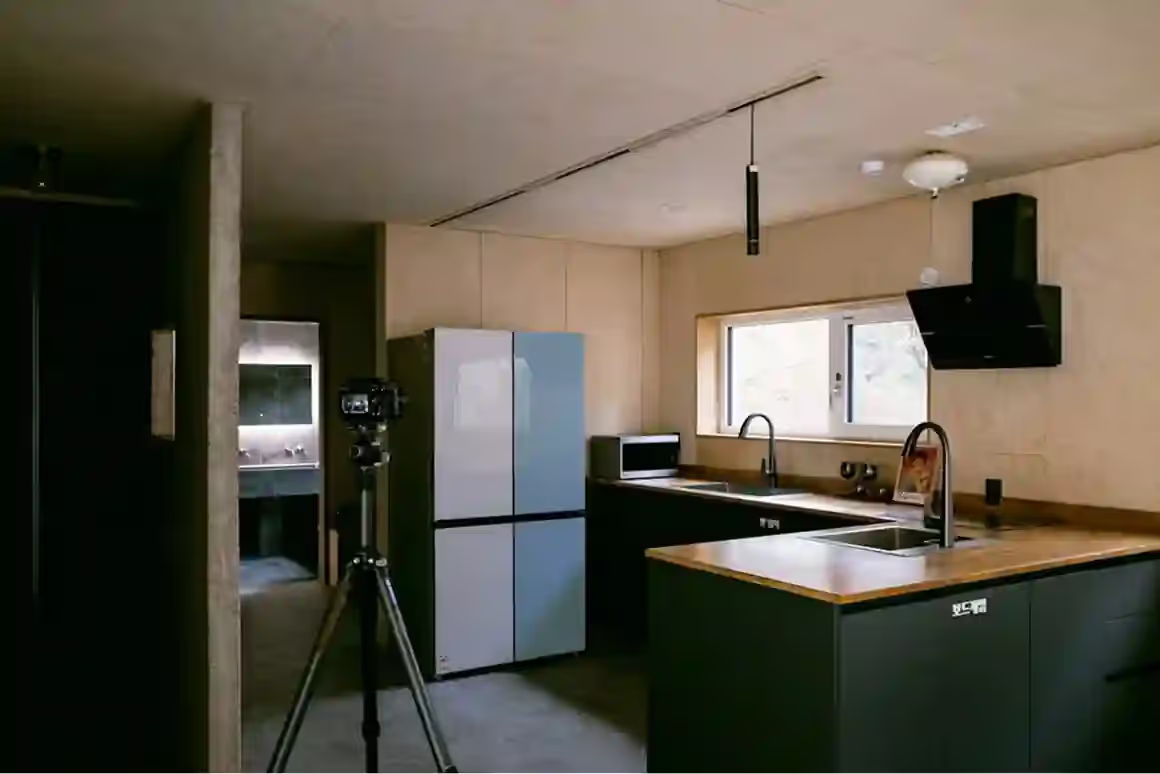
The Moment It Started Looking Like a Kitchen Again
After two months of chaos, there was finally a day when I walked into the space and thought "oh, this is going to be a kitchen."
The cabinets were installed. The countertops were templated and would be installed the following week. You could see the layout and imagine how it would function.
That was the turning point emotionally. Up until then, it had just been destruction and mess. Now we could visualize the end result.
Sarah started planning where everything would go in the new cabinets. I started thinking about the first meal we'd cook. The finish line felt real for the first time.
The Final Push (And Final Problems)
The last month of the project was all about finishing details. Installing hardware, completing the backsplash, hooking up appliances, fixing all the little issues that pop up.
This phase moves slower than you expect because everything has to be perfect. A cabinet door that's slightly crooked needs to be adjusted. The outlet for the microwave is in the wrong spot and needs to be moved. The paint color looks different under the new lighting and needs to be redone.
We also had our final inspection during this phase, which required fixing several things the inspector flagged. Nothing major, just detailed stuff that had to be corrected before we could get our occupancy permit.
The very last thing was installing the cabinet hardware. Sarah had spent weeks picking out the perfect handles and pulls. Watching Tom install them felt like putting the final piece in a puzzle.
Budget Reality Check (Spoiler: We Went Over)
Remember how we started with a $25,000 budget? Yeah, that didn't happen.
Here's the breakdown of where the extra money went:
- Hidden electrical issues: $2,800
- Window modification: $1,200
- Upgraded lighting fixtures: $1,500
- Higher-end cabinet hardware: $800
- Additional outlets and switches: $900
- Painting the adjacent dining room (seemed silly not to while we were at it): $1,200
- Miscellaneous change orders and fixes: $2,100
Total overage: $13,000
Some of these were necessary fixes we discovered during construction. Others were upgrades we decided on once we saw how good everything else looked.
The lesson here is to budget at least 20% extra for surprises and upgrades. Maybe 30% if your house is older or you tend to be indecisive about finishes.
What We'd Do Differently
Looking back, there are definitely things we'd handle differently if we were starting over.
Start the process earlier. Good contractors are booked out for months. If you want your kitchen done by a specific date, start planning at least six months ahead.
Order long-lead-time items first. Custom cabinets, special-order appliances, and natural stone countertops can take forever. Get these ordered as early as possible.
Set up a better temporary kitchen. We should have moved our microwave, coffee maker, and a mini-fridge to the basement and created a proper temporary cooking space.
Budget more for eating out. We spent way more on restaurants and takeout than we planned. Factor this into your total project budget.
Make all finish decisions before construction starts. Changing your mind about cabinet hardware or paint colors mid-project adds time and stress.
Communicate constantly with your contractor. Tom was great about giving us daily updates, but we should have asked more questions about upcoming decisions and potential delays.
The Results (Was It Worth It?)
Four months after we started, we finally had our dream kitchen. And honestly? It was better than we'd imagined.
The layout flows so much better than our old kitchen. The island gives us tons of extra prep space and seating for casual meals. The storage is incredible - we can actually find things now.
But the best part is how the space feels. Our old kitchen felt cramped and outdated. The new one feels bright, open, and modern. It's become the heart of our house in a way the old kitchen never was.
Friends comment on it every time they visit. Our real estate agent says it probably added $40,000+ to our home value. And most importantly, we actually enjoy cooking and hanging out in the space.
So yes, despite all the stress, delays, and budget overruns, it was absolutely worth it.
Finding Kitchen Reno Near Me Options
One of the first things people ask me is how to find good contractors in their area. This is trickier than it seems because a Google search for "kitchen reno near me" returns hundreds of results.
Here's what I learned about vetting local contractors:
Start with personal recommendations. Ask friends, neighbors, and coworkers who've had work done recently. Personal experiences are way more valuable than online reviews.
Check with local kitchen and bath showrooms. The salespeople at these places work with contractors all the time and know who does good work versus who causes problems.
Look for contractors who specialize in kitchens. Someone who does bathrooms, additions, and general contracting might not have the specific experience you need for a complex kitchen project.
Ask to see recent work in person. Photos can be misleading. If a contractor is proud of their work, they should be able to arrange for you to see a recently completed kitchen.
Get detailed written estimates. Vague estimates lead to change orders and budget overruns. Good contractors provide line-item pricing for everything.
Check licenses and insurance. This seems obvious, but some homeowners skip this step and regret it later.
Trust your gut. If someone seems disorganized during the bidding process, they'll probably be disorganized during construction too.
The Design Trends We Considered
While researching our renov kitchen project, we looked at tons of current design trends. Some we loved, others we decided weren't right for us.
White kitchens were everywhere when we started planning. They look clean and timeless, but we worried about showing every fingerprint and stain. We ended up going with light gray cabinets instead.
Open shelving looks great in photos but didn't seem practical for our lifestyle. We cook a lot and need places to hide the everyday clutter.
Waterfall countertops on islands were popular, but our designer pointed out they make bar seating awkward and add a lot to the cost.
Farmhouse sinks were trending, but our kitchen wasn't big enough to accommodate one without sacrificing counter space.
Two-tone cabinets (different colors for upper and lower cabinets) looked interesting, but we decided it might look dated in a few years.
Bold backsplashes with geometric patterns or bright colors were tempting, but we went with classic subway tile because it won't go out of style.
The key was distinguishing between trends that enhance functionality versus trends that are just aesthetic choices. We focused on improvements that would make our kitchen work better for how we actually live.
Appliance Selection Process
Choosing appliances turned out to be more complicated than just picking brands and models we liked.
Size constraints were a major factor. Our kitchen layout limited us to specific refrigerator and range dimensions. Many models we wanted simply wouldn't fit.
Electrical requirements ruled out some options. Our house's electrical panel couldn't handle certain high-powered ranges without expensive upgrades.
Style coordination was important for resale value. Even though we liked mixing different brands, our designer recommended staying within similar style families.
Budget allocation required tough choices. We splurged on the range and range hood because we cook a lot, but went with mid-range dishwasher and refrigerator models.
Energy efficiency was a consideration, but not the deciding factor. The most efficient models were often significantly more expensive with payback periods of 10+ years.
Warranty and service became important after our old dishwasher died. We researched which brands have good local service support.
We ended up with a mix of brands that worked well together functionally and aesthetically, even though it wasn't the "matching suite" approach that some people prefer.
Storage Solutions That Actually Work
One of our main goals was dramatically improving kitchen storage. Our old kitchen had basic cabinets with fixed shelves that wasted tons of space.
Pull-out drawers in lower cabinets were a game-changer. Everything is accessible without having to get on your knees and dig around in the back of deep cabinets.
Lazy Susans in corner cabinets solved the problem of dead space that's impossible to reach. These aren't cheap, but they make corner storage actually usable.
Drawer dividers keep utensils and small items organized instead of becoming a jumbled mess. We got adjustable ones that can be reconfigured as needed.
Pantry pull-outs in a tall cabinet replaced our old pantry closet. Everything is visible and accessible, and we can fit way more stuff in the same footprint.
Under-cabinet toe-kick drawers added hidden storage for things like baking sheets and cutting boards that are awkward to store elsewhere.
Interior cabinet lighting makes it possible to actually see what's in the cabinets, especially the deeper ones.
The storage upgrades added about $3,000 to our cabinet cost, but they've made the kitchen so much more functional that it was worth every penny.
Timeline Management and Expectations
Managing expectations about timeline is crucial for maintaining sanity during a kitchen renovation.
Initial estimates are always optimistic. Add at least 50% to whatever timeline your contractor gives you. If they say six weeks, plan for nine weeks.
Weather affects schedules. Rain delays deliveries. Extreme heat or cold affects some installation processes. Plan around seasonal issues if possible.
Permit delays are common. Government approval processes have their own timeline that you can't control. Build extra buffer time for this.
Change orders extend timelines. Every modification or upgrade you decide on mid-project will add time to the schedule.
Coordination between trades is complex. Electricians, plumbers, cabinet installers, and countertop fabricators all have to sequence their work properly.
Final inspections take time. Don't expect to use your kitchen the day the last worker leaves. Final inspections and punch list items can take another week.
Holiday and vacation schedules matter. Construction crews take time off, which can add weeks to projects that span busy holiday periods.
The key is planning for delays rather than hoping everything goes perfectly. Having realistic expectations reduces stress and disappointment.
Dealing with Construction Stress
Living through a major renovation is genuinely stressful. Here are strategies that helped us cope:
Establish daily routines that work around construction schedules. We learned to shower and have coffee before the crew arrived at 7 AM.
Create quiet spaces in other parts of the house where you can escape the noise and dust. Our bedroom became a retreat during the worst phases.
Communicate with neighbors about the project timeline and potential disruptions. Most people are understanding if you give them advance notice.
Document progress with photos to remind yourself that things are actually moving forward when it feels like nothing is happening.
Plan weekend getaways during the messiest phases of construction. Sometimes you just need to escape your own house.
Keep a sense of humor about the chaos. Renovations are temporary, but the stress can feel overwhelming if you take everything too seriously.
Focus on the end result by visiting showrooms or looking at inspiration photos when you're feeling discouraged about the current mess.
The stress is real and temporary. Having coping strategies makes the whole experience more manageable.

Working with Your Contractor
The relationship with your contractor makes or breaks the renovation experience. Here's what we learned about making this partnership work:
Establish communication preferences early. Some contractors prefer texting, others like phone calls. Figure out what works and stick to it.
Ask for daily updates on progress and any issues that come up. Good contractors should be proactive about communication.
Make decisions quickly when your input is needed. Contractors can't move forward if you take days to choose between tile options.
Respect their expertise while advocating for your preferences. There's usually a reason why they recommend certain approaches.
Address problems immediately rather than hoping they'll resolve themselves. Small issues become big problems if ignored.
Keep the job site clean of your belongings so crews can work efficiently. Store personal items elsewhere during construction.
Pay on schedule according to your contract terms. Reliable payment keeps contractors motivated and on your project.
Good contractors want happy customers and will work with you to solve problems. But the relationship requires communication and cooperation from both sides.
The Inspection Process
Multiple inspections happen during a kitchen renovation, each focusing on different aspects of the work.
Rough inspection happens after framing and rough electrical/plumbing but before walls are closed up. This is when major code violations get caught.
Insulation inspection verifies that proper insulation is installed before drywall goes up. This is required in many areas for energy efficiency compliance.
Final electrical inspection ensures all outlets, switches, and fixtures are properly wired and meet current electrical codes.
Final inspection covers everything and results in the occupancy permit that allows you to legally use the completed kitchen.
Building department inspectors are looking for code compliance, not aesthetics. Don't expect them to comment on your design choices.
Failed inspections require corrections before re-inspection, which can delay project completion. Most issues are minor and easily fixed.
Understanding the inspection process helps you anticipate potential delays and ensures your renovation meets all applicable building codes.
Post-Renovation Reality
The first few weeks after completion are an adjustment period as you figure out how to actually live in your new kitchen.
Everything feels different at first. Muscle memory from your old kitchen takes time to update. You'll reach for things in places they're no longer located.
Organization takes time to optimize. Even with great storage solutions, it takes weeks to figure out the best places for everything.
Minor issues surface during normal use. Cabinet doors that need adjustment, drawers that stick slightly, switches that aren't in intuitive locations.
Maintenance requirements become apparent. New surfaces and finishes have different cleaning needs than your old kitchen.
Entertaining opportunities expand as you start using the space for its intended purposes. Our first dinner party in the new kitchen felt like a celebration.
Ongoing tweaks continue for months as you identify small improvements or additions that would make the space work even better.
The adjustment period is normal and temporary. Soon enough, the new kitchen will feel like it's always been that way.
Final Thoughts and Advice
Our kitchen reno experience taught us that renovation projects are part construction, part project management, and part emotional endurance test.
The practical stuff - choosing materials, managing budgets, coordinating schedules - is learnable. The emotional stuff - dealing with stress, making decisions under pressure, living in chaos - is harder but manageable with the right expectations.
If you're considering a kitchen renovation, go into it with realistic expectations about timeline, budget, and stress levels. Plan for problems, communicate constantly, and focus on the long-term results rather than day-to-day frustrations.
Most importantly, choose your contractor and other professionals carefully. The right team makes all the difference between a renovation experience you'll remember fondly versus one you'll want to forget.
Our kitchen renovation was challenging, expensive, and disruptive. It was also one of the best investments we've made in our home and our quality of life.
The space we use every day is now beautiful, functional, and designed specifically for how we live. That's worth a few months of chaos and some budget overruns.
Good luck with your project. Trust the process, even when it feels like nothing is going according to plan.